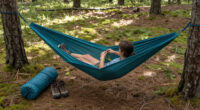
This guide shows you how to hang and use a portable travel hammock from a stuff sack to a comfortable, safe setup between two anchor points — and how to pack it away so it is ready for the next trip. It is written for beginners: no prior hammock experience is required. If you have a gathered-end hammock with webbing straps (the most common travel style), you can complete your first hang in under 30 minutes once you understand the process.

Get travel and outdoor gear delivered free — and shop member deals
- Fast, free delivery on millions of items
- Access to Prime Big Deal Days deals on October 6–7
- Prime Video, Amazon Music and more included
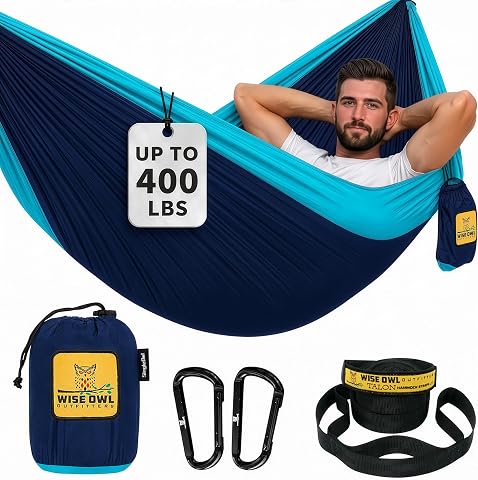
Wise Owl Outfitters Camping Hammock with Tree Straps – Single or Double, up to 500 lbs
- ✔ Brand: Wise Owl Outfitters
- ✔ Material: Quick-dry parachute nylon
- ✔ Single Size: 9 ft x 4.5 ft
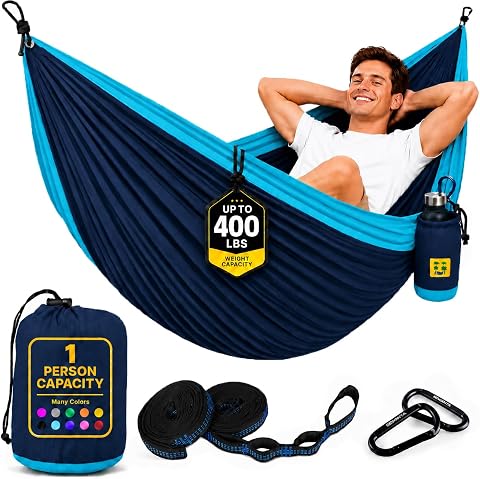
SEWANTA Portable Camping Hammock with Tree Straps, Blue
- ✔ Brand: SEWANTA
- ✔ Material: Nylon
- ✔ Single Capacity: 400 lbs
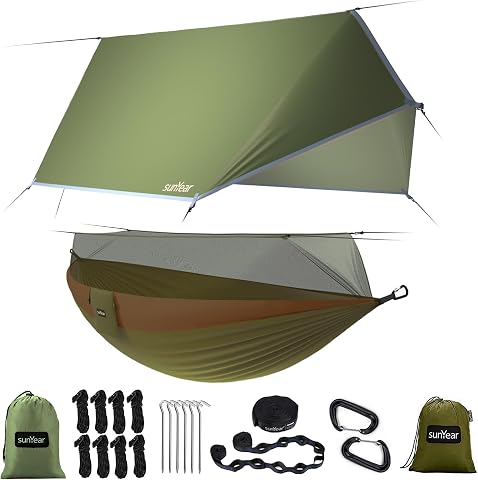
Sunyear Camping Hammock with Mosquito Net & Rain Fly, Single & Double Options, Includes Tree Straps
- ✔ Material: Nylon & Oxford fabric
- ✔ Double Size: 118 x 78 in
- ✔ Single Size: 106 x 55 in
A portable travel hammock is a lightweight fabric hammock that packs into its own pouch, typically weighing 300 grams to 1 kilogram. Travelers, campers, hikers, and backpackers use them for sleeping outdoors, relaxing in parks, or replacing a tent on warm-weather trips. Setting one up involves four things done in the right order: picking safe anchor points, attaching suspension straps at the correct height and distance, hanging the hammock at the right tension, and lying in it at the correct angle. Most problems beginners face — a hammock that is too tight, a sag to the ground, or damaged bark — come from skipping or rushing one of those steps.
This guide covers setup with tree straps (also called webbing straps), which protect the tree and work without knots for most modern hammocks. If your hammock uses ropes only, the same anchor-selection and geometry rules apply; you will just tie a basic knot instead of clipping a carabiner.
Difficulty: Beginner | Time: 15-30 minutes to set up; the full guide takes about 20 minutes to read
What You’ll Need
Tools & Materials:
- A portable travel hammock with attached stuff sack
- A pair of tree straps (webbing suspension straps with sewn loops) — many hammocks include these; buy separately if not
- Two carabiners (usually included with the hammock or straps)
- Optional: a bug net, rain tarp, and underquilt or sleeping pad for overnight use
Knowledge:
- No prior hammock experience needed
- Basic ability to estimate distance and height by eye (a pace-length of roughly one meter helps)
Check local rules before hanging in parks or conservation areas. Some prohibit hammocks or require wide straps (typically 2.5 cm or wider) to protect tree bark. Never hang a hammock higher than you are willing to fall — waist height or lower is the standard for beginners.
Wise Owl Outfitters Camping Hammock with Tree Straps – Single or Double, up to 500 lbs
The Wise Owl Outfitters hammock earns our top spot because it nails the balance that defines a great travel hammock: 16 oz of total weight, a stuff sack that shrinks it down to water-bottle size, and a kit that leaves nothing to buy separately. The 9 ft tree straps with five adjustable loops mean you can dial in your hang tension without knots or hardware, and setup genuinely takes minutes.Compared with the SEWANTA, the Wise Owl pulls ahead on fabric quality — the triple-stitched quick-dry parachute nylon is machine washable, which matters after a muddy trip when you’re packing everything back into a suitcase. Compared with the Sunyear, it gives up weather protection entirely; there’s no net or rain fly here, so it’s strictly a fair-weather (or sheltered) option.The tradeoff is real: with a 400 lb single capacity, larger solo travelers or anyone sharing the single size should step up to the Double. But for backpackers, hostel-hoppers, and anyone counting grams, this is the most complete ultralight package of the three.
Pros:
- Ultra-lightweight at 16 oz and packs down very small for backpacking
- All-in-one kit with tree straps, carabiners, and stuff sack included
- Quick tool-free setup with 5-loop adjustable straps
- Triple-stitched quick-dry nylon is durable and machine washable
Cons:
- Requires two trees or anchor points — no stand included
- Single version limited to 400 lbs capacity
- No weather or insect protection included
Best for: Backpackers and frequent travelers who want the lightest complete kit
Not ideal for: Campers who need bug and rain protection built in
Bottom line: The best all-around portable hammock for travelers who prioritize weight and completeness over weather readiness.
“The best all-around portable hammock for travelers who prioritize weight and completeness over weather readiness.”
SEWANTA Portable Camping Hammock with Tree Straps, Blue
SEWANTA’s hammock takes the value slot by covering the essentials — two 9 ft straps, steel carabiners, and an attached carry bag — without asking you to pay for features you may not use. Setup is quoted at 1–2 minutes, and the same 400/500 lb capacity split as the Wise Owl means it handles the same range of users.The standout detail is the attached pouch that doubles as a pocket while you’re lounging — a small thing that neither competitor offers, and genuinely useful for keeping a phone or headlamp off the ground.Where it falls short of the Wise Owl is fabric and refinement: it’s a standard nylon rather than triple-stitched parachute nylon, and the manufacturer advises testing the hammock’s strength before use, which tells you the build confidence isn’t quite at the same level. It’s also, like the Wise Owl, a fair-weather-only option next to the Sunyear’s full weather kit. If you want a cheap, low-commitment hammock for occasional trips and backyard hangs, this makes more sense than paying for the premium option.
Pros:
- Compact and lightweight for travel
- Attached pouch doubles as a pocket while in use
- Includes straps and carabiners for setup
- Single size supports up to 400 lbs
Cons:
- Hammock strength should be tested before use
- Double size limited to a combined 500 lb capacity
- Steel carabiners and basic nylon feel less refined than rivals
Best for: Casual campers and first-time buyers on a budget
Not ideal for: Heavy or demanding users who need maximum fabric confidence
Bottom line: A sensible budget pick for occasional use, as long as you accept a simpler build than the Wise Owl.
“A sensible budget pick for occasional use, as long as you accept a simpler build than the Wise Owl.”
Sunyear Camping Hammock with Mosquito Net & Rain Fly, Single & Double Options, Includes Tree Straps
The Sunyear plays a different game than the other two. Rather than competing on weight, it competes on completeness as a shelter: a dense mosquito net, a 3000mm PU waterproof rain fly, 10 ft tree straps, eight ropes, four tent stakes, and two stuff sacks all ship together. This is a hammock you can actually sleep overnight in through wind, rain, and bugs.It also leads on capacity — 500 lbs single, 600 lbs double — comfortably ahead of both the Wise Owl and SEWANTA, which matters if you’re a larger camper or sharing with a partner and gear. The longer 10 ft straps give you more flexibility on wide tree spacing than the 9 ft straps on the other two kits.The honest tradeoffs: all that kit adds meaningful bulk and weight compared with the 16 oz Wise Owl, so it’s a poorer fit for ounce-counting backpackers. We’d also flag that the rain fly configuration varies by variant — confirm what’s included before ordering — and the brand’s claims lean heavily on marketing language rather than independently verified durability. Treat it as the most capable system here, but with an asterisk on long-term confidence.
Pros:
- Complete kit included — no extra purchases needed
- Waterproof rain fly with 3000mm PU rating for storm protection
- Dense mosquito net keeps insects out
- Highest capacities here: 500 lbs single, 600 lbs double
Cons:
- Rain fly configuration may require separate purchase depending on variant
- Long-term durability not independently verified
- Heavier and bulkier than dedicated ultralight options
Best for: Overnight campers and travelers heading into buggy or wet climates
Not ideal for: Ultralight backpackers counting every ounce
Bottom line: The only true all-weather camp system of the three — pick it when bugs and rain are part of the itinerary.
“The only true all-weather camp system of the three — pick it when bugs and rain are part of the itinerary.”
As an Amazon Associate we earn from qualifying purchases.
Before You Start
Unpack your hammock at home once before your first trip. Confirm you have both straps, both carabiners, and that the hammock fabric has no tears or pulled seams. Count your gear: hammock, strap one, strap two, two carabiners. This takes two minutes and prevents arriving at a campsite with half a suspension system.
Know your hammock’s total length (fabric plus suspension reach). A typical gathered-end hammock is about 3 meters of fabric and needs roughly 4.5 to 6 meters between anchor points. If your straps are not long enough for the distance, you cannot fix this at camp — pack longer straps or a whoopie sling extension.
Step-by-Step Instructions
Step 1: Find and inspect two healthy anchor points 4.5 to 6 meters apart
Walk your planned area and measure the distance between candidate trees by pacing it out: for most adults, count five to seven normal strides to cover 4.5 to 6 meters. Inspect each tree individually before choosing it.
Test each tree against four criteria: confirm it is alive, check that it is at least 15 cm in diameter (about the width of a forearm and hand together), look up and verify no dead branches hang above, and push the trunk to feel that it stands firmly upright with no lean or exposed roots. Reject dead trees, thin saplings, and anything with loose bark or hanging limbs overhead. Plan to attach your straps at roughly head height on the trunk — about 1.5 to 1.8 meters up.
Tip: Dead overhead branches are called widowmakers for a reason. Look up before you commit to a spot, even if the trees themselves look perfect.
Check: Both trees pass the diameter and health check, the distance falls within 4.5 to 6 meters, and nothing dead hangs above your hang zone.
Step 2: Wrap the first tree strap at head height
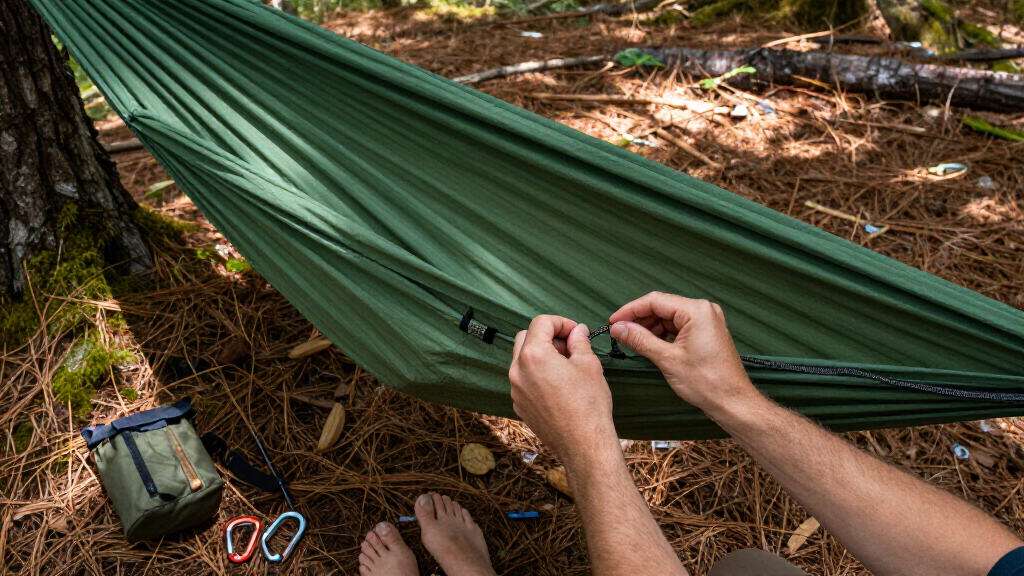
Take one strap and wrap it around the first tree at about 1.5 to 1.8 meters high, with the sewn loops facing you. Pass one end through a loop on the other end (or follow the manufacturer’s wrap method) to cinch the strap snug against the bark. Flatten the strap against the tree so it sits with no twists.
Pull the strap firmly to remove all slack. Test it by yanking down hard — it must not slide down the trunk when loaded. Finish by clipping a carabiner through the end loop so it hangs ready.
Tip: Position the strap flat and untwisted. A twisted strap concentrates pressure on a narrow band of bark and can cut into the tree under load.
Check: The strap is snug, flat, does not slide when you pull down hard on it, and the carabiner hangs at head height.
Step 3: Wrap the second strap and check the geometry
Repeat the wrap on the second tree at the same height as the first. Stand back and sight between the two carabiners: confirm they are level with each other and measure the straight-line distance between them, leaving roughly 1.5 to 2 meters for the hammock to hang between after attachment.
Compare the distance to your hammock’s length plus 30 cm. If the gap is much smaller, the hang will be too tight; if it is much larger, your suspension will not reach. Fix the problem now by re-wrapping higher or lower, or by moving to different trees — this is the easiest moment to correct geometry.
Check: Both straps are level, secure, and spaced so the hammock’s ends plus carabiners can bridge the gap with some strap to spare.
Step 4: Clip the hammock between the two carabiners
Unroll the hammock from its stuff sack, keeping the sack attached so it doubles as a gear pocket. Gather each end of the hammock and clip its end loop or attached cord directly into the carabiner on each strap. If your straps have multiple loops, start by clipping into a middle loop on each side.
Adjust the hang height by moving each carabiner to a different loop: choose closer loops to shorten the hang, farther loops to lengthen it. Keep adjusting until the hammock’s lowest point sits at about sitting-chair height — around 40 to 50 cm off the ground — when you sit in it.
Check: The hammock hangs centered between the trees, both ends are clipped securely through their carabiners, and the fabric sags in a gentle curve without touching the ground.
Step 5: Load-test the hang before getting in
Grip the fabric with both hands, keep your feet under you, and push down hard with a large portion of your weight. Bounce gently two or three times. Watch the straps and carabiners and listen to the fabric: the straps should not slip down the trunks, the carabiners should stay fully clipped, and you should hear no tearing or creaking.
If anything slips or shifts, unclip the hammock, re-wrap the strap higher and tighter, and repeat the test. Do not skip this step — it is what catches a bad anchor before it catches you.
Check: The setup holds under a hard push without slipping, shifting, or making noise, and the hammock’s low point still clears the ground.
Step 6: Enter the hammock correctly: sit first, then rotate
Stand facing the hammock, spread the fabric open with both hands, and sit down in the middle as if sitting into a chair. Once seated and stable, swing your legs up and rotate your body so you lie along the centerline.
Shift your body into the diagonal position: angle yourself roughly 30 degrees off the hammock’s centerline. This flattens the sag and supports your back horizontally instead of bowing it. Most people who find hammocks uncomfortable are lying dead straight along the center.
Tip: Never dive in or flop down. Hammock fabric can survive it, but your tailbone and the seams cannot, and a hard entry is the leading cause of rips and falls.
Check: You lie at a diagonal, the fabric wraps slightly around your shoulders and knees, your back is close to flat, and nothing touches the ground.
Step 7: Exit the hammock and pack it up
Exit by reversing the entry: rotate to a seated position in the center, hold the fabric, and stand up with your feet planted. Unclip one carabiner, then the other, and let the hammock fall freely. Undo and remove the straps from both trees.
Pack the hammock in four moves: hold it by one end and let it hang so the fabric falls into a long strip; fold that strip lengthwise two or three times; shake out any leaves and grit first — debris inside the sack grinds into the fabric over time; then roll it tightly from the far end toward the stuff sack and stuff it in. Loop the straps around the rolled bundle or store them in the same sack.
Check: The hammock and both straps fit back into the stuff sack, the sack zips or cinches closed, and no dirt or leaves are packed inside.
Common Mistakes to Avoid
- Hanging the hammock too tight, like a guitar string — A taut hang throws you into a painful curved position and stresses the seams. Leave visible sag — the hammock should form a 30-degree angle where the suspension meets the fabric. Start looser than feels right and tighten one loop at a time only if you touch the ground.
- Attaching straps to thin, dead, or unstable trees — Apply the forearm-width rule (15 cm minimum diameter) and reject anything dead, leaning, or cracked. A tree that snaps under load drops you hard and can injure you. When in doubt, find a bigger tree.
- Using rope directly on bark instead of webbing straps — Thin cord cuts into bark and kills trees, and it gets you banned from parks that require straps. Always use flat webbing at least 2.5 cm wide against the trunk.
- Lying straight along the centerline and deciding hammocks hurt your back — The diagonal lie is the whole trick. Rotate your body about 30 degrees off center so your head and feet occupy opposite corners — this flattens the fabric into a usable bed.
Troubleshooting
Problem: The hammock bottom touches the ground when you sit in it
Solution: Shorten the suspension by moving the carabiners to loops closer to the hammock, or re-wrap the straps higher on the trees. Recheck that the anchor points are no more than 6 meters apart; if they are too far, move a strap wrap or relocate to closer trees.
Problem: You cannot reach between the anchor points with your suspension
Solution: Move the straps down the trunks to a lower wrap position, use the farthest loops on both straps, or choose closer trees. Do not stretch the suspension rope-tight to bridge the gap — an overstretched hang is both uncomfortable and hard on the stitching.
Problem: A strap slides down the tree when loaded
Solution: The wrap is too loose or the bark is smooth and wet. Re-wrap higher, cinch the pass-through loop tight before loading, and test with a hard downward pull. On slick bark, add a second wrap around the trunk.
Problem: The hammock feels like it is folding you in half
Solution: The hang is too tight or you are lying along the centerline. Loosen by one loop on each side, then reposition your body diagonally. If the problem persists, your hammock may simply be too short for you — a hammock should be at least 60 cm longer than your height.
What Success Looks Like
Your setup is successful when all of the following are true: both straps sit flat and snug on healthy trees at least 15 cm in diameter; the hammock hangs level with its low point 40 to 50 cm above the ground; a hard load-test produces no slipping, noise, or shifting; you can sit and lie down diagonally with a nearly flat back; and the whole system — hammock and both straps — fits back into its stuff sack when you leave. You should be able to repeat the full setup in about 10 minutes after two or three practice hangs.
Next Steps
Practice the full setup and takedown twice at a local park before your first trip so the loop spacing and geometry become instinct. For overnight use, add a rain tarp hung above the hammock (pitched lower than you think you need) and insulation underneath — hammock air flow underneath will chill you even in mild temperatures, so a sleeping pad or underquilt is not optional for cool nights. Inspect the fabric, straps, and stitching for wear before each season, and retire any strap with visible cuts or fraying. Replace carabiners only with rated climbing-style biners, never hardware-store spring clips.
Frequently Asked Questions
How far apart should the trees be for a travel hammock?
Between 4.5 and 6 meters for a standard 3-meter gathered-end hammock. Below 4.5 meters the hang becomes too tight; beyond 6 meters most stock suspensions cannot reach. A rough check: five to seven normal walking strides.
How high should I hang the hammock off the ground?
Attach the straps at about head height (1.5 to 1.8 meters) so the hammock’s low point ends up 40 to 50 cm off the ground — sitting-chair height. Never hang higher than a height you would be comfortable falling from.
Can I hang a hammock without trees?
Yes, using fixed posts, approved hammock stands, or purpose-built frames. Do not use fence posts, signposts, or anything not rated for body weight, and never attach a hammock to a vehicle hitch or roof rack without dedicated rated hardware.
Are hammocks comfortable enough to sleep in overnight?
Most people sleep well in a correctly hung hammock using the diagonal lie, which keeps the back flat. The main comfort issue overnight is cold from below — add a sleeping pad or underquilt, plus a rain tarp for weather protection.
How do I stop damaging the trees?
Use flat webbing straps at least 2.5 cm wide, wrap them snugly so they do not slide under load, and take them down when you leave. Never tie thin rope directly to a trunk, and check park regulations, since some areas restrict or prohibit hammocks.
Evergreen bestsellers Picks
bestsellers
As an affiliate, we earn on qualifying purchases.